Camel pose (Ustrasana) is a kneeling backbend, and you can learn it at home by moving in a fixed order: set the knees, lift the chest, press the hips forward and come up slowly. This lesson gives you seven spoken cues, a four-rung depth ladder and a slow exit for a room-temperature floor.
A quick note before we start. This is general information, not medical advice. If you have a back, neck or shoulder problem, high or low blood pressure, a recent injury, or you are pregnant, please consult a healthcare professional before you practise.
Camel Pose at Home: What You Are Really Learning
Camel pose looks like a flexibility test, so most people go straight for the heels. In fact it tests three quieter things: hips that travel forward, a chest that lifts first and a neck that follows. A photo cannot check those for you. A spoken script can, because you hear one cue, move, and then check your body against it.
That is how we teach it in the online course. You read a line aloud, do what it says, then read the next line. After a few weeks the lines live in your head, and you start cueing yourself.
Where camel pose sits in the sequence
In the Original Hot 26&2 sequence, camel pose is a late floor backbend. It arrives after the lying-down backbends have warmed the spine, so the body is ready for a deeper shape. Our page on the 26&2 poses shows the full class order, so you can see what comes before and after.
At home you will practise at room temperature, and that is deliberate. You learn the shape and the cues first. If you add heat later in a studio, you do it with a teacher in the room.
Why the name helps
Ustrasana comes from ushtra, the Sanskrit word for camel. Picture the long curve of a camel's neck and the hump of its back. The chest lifts and opens, the hips push forward and the head follows the curve, never leads it.
Seven Spoken Cues for Camel Pose at Home
Read each line aloud, or record yourself saying it, then do what it says. Pause for one breath between lines. This is our own plain-language script for home study. It is not the class dialogue, which is taught live by a trained teacher.
Line
What you say aloud
What it protects
Error it catches
1
Kneel with the knees hip-width apart, thighs upright, tops of the feet flat.
Gives the whole shape a steady base
Knees wide, thighs leaning back too soon
2
Place your hands on the lower back, fingers pointing down, elbows drawing together.
Supports the pelvis and starts the chest lift
Hands pushing the lower back forward
3
Breathe in and lift your chest first.
Spreads the bend across the whole spine
Head dropping back before the chest rises
4
Press the hips forward over the knees.
Keeps the bend out of the lower back
Hips stuck behind the knees
5
Keep the chin slightly lifted. The head follows only if the neck feels free.
Keeps the neck long and quiet
Head thrown back to "get deeper"
6
Stay for three slow breaths.
Keeps the breath steady and the hold short
Holding the breath, gripping the jaw
7
Breathe out and come up chest first, head last, then sit back on your heels.
Gives the body time to adjust to upright
Snapping up with the head leading
Table 1. Seven camel pose cues in plain words, what each protects and the error it catches. Written for home study by the YogaFX team.
Notice how each line protects the next. The knees make the base, the base lets the chest lift, and the lifted chest lets the hips travel. If you remove one line, the shape changes.
Hold time and rounds
Hold the top position for three to five slow breaths. Then sit back on your heels, rest for a few breaths and repeat once. Two short rounds teach more than one long hold, because the first round shows you where you rush and the second lets you fix it.
Safe Depth: A Four-Rung Ladder for Camel Pose
There is no medal for touching the heels. A safe depth is the one where your hips travel forward, your breath stays slow and you feel work across the front of the thighs and chest. You should not feel a pinch in the back or a squeeze in the throat. Use the ladder below, and step down on any day that feels heavy.
Rung 1
Upright, hands on hips
Chest lifts a little, head stays level. Start every week here.
Rung 2
Hands on the lower back
Elbows draw in and the hips press forward. Most beginners stay here for weeks.
Rung 3
Hands on blocks
Blocks stand beside the heels and the hands reach them. The chest stays high.
Rung 4
Hands to the heels
Only when hips stay forward, breath stays slow and the neck stays long.
Stop sign
Come up and rest
Sharp pain, tingling, a squeezed throat or dizziness. Sit back and stay there.
A home depth ladder for camel pose, with a hold of 3 to 5 breaths per rung. Sources: YogaFX online lesson notes; stretching guidance from Mayo Clinic, 2023.
Move up only when the rung below feels steady across several sessions. Many people stay on rung two for a month and still feel a clear stretch across the front of the hips. If one week feels worse than the last, go down a rung without any guilt.
Props that help in a home room
Prop
What it does
Use it when
Folded blanket under the knees
Softens the pressure of a hard floor on the kneecaps
Your knees complain on a bare mat
A block beside each heel
Brings the floor closer to your hands
Your hands cannot reach the heels without the hips collapsing
A phone propped side-on
Lets you check whether the hips travel past the knees
You practise alone and want to see the side view
No prop, hands on the lower back
Keeps the focus on hips and chest
You are new to the pose or your back feels tight
Table 2. Simple props for camel pose at home and when each one earns its place.
If you want to see how camel pose fits next to the other floor postures, our guide to hot yoga poses for men puts them in a four-week plan, and the cobra pose online lesson covers the backbend that comes just before it.
Warm Up First, Then Come Out Slowly
Do not start cold
Camel pose is a deep backbend, so do not treat it as a warm-up. Mayo Clinic says you may hurt yourself if you stretch cold muscles, and it advises smooth movement without bouncing. At home, that means five minutes of brisk walking or marching on the spot, then a few arm circles and standing side stretches, before you kneel.
The side stretch matters more than it looks. It opens the ribs and the front of the shoulders, which makes the chest lift in camel pose easier to find.
The slow exit, step by step
Most students think about the way in. Teachers think about the way out. When you change position fast, some people feel lightheaded, so we move in small stages and give the body a moment at each one.
Keep the hands on your lower back. Do not reach for the floor or let go at the top.
Lift the chest and bring the head upright. The head is the last thing to come up.
Press the hips back and sit on your heels. Let the arms hang loose.
Breathe for three slow breaths. Keep the gaze soft and the jaw relaxed.
Stand only when you feel steady. If you feel dizzy, stay seated and sip water.
Rest matters as much as the shape. Our page on what to do when you feel dizzy covers the signs that mean you should sit down, and it's worth reading before your first session.
Five Camel Pose Mistakes at Home and Their Fixes
Home practice removes the teacher's eyes, so small errors can repeat for weeks. These are five common errors to watch for, with the first fix to try.
Chasing the heels. Go back to rung two and let the hips travel forward first.
Folding in the lower back. Tuck nothing. Press the front of the hips toward the wall in front of you.
Rolling the head back to get deeper. Keep the chin slightly lifted and let the chest do the work.
Skipping the second round. The first round is the draft, and the second is where you fix it.
Kneeling on a bare hard floor. Fold a blanket under the knees so you can think about your hips, not your kneecaps.
For example, a student who always feels camel pose in the lower back is usually leaving the hips behind the knees. Pressing the hips forward with the hands on the back fixes the problem at once.
What Health Sources Say About Stretching and Yoga Safety
Stretching: tension, not pain
Mayo Clinic advises that you expect tension while stretching, not pain. In its words, "If it hurts, you've pushed too far." It suggests holding a typical stretch for about 30 seconds. Camel pose is a deep backbend, so we start well below that, with three to five slow breaths, and build only if the neck and back stay quiet.
Coming up from a deep position
Mayo Clinic describes orthostatic hypotension as lightheadedness or dizziness when standing after sitting or lying down. It also says that standing causes blood to collect in the legs and belly because of gravity, and that not drinking enough fluids and strenuous exercise with a lot of sweating can lead to dehydration.
That page is about standing up, not backbends. We borrow its logic: change position slowly, and drink water before you practise.
Yoga safety in general
The National Center for Complementary and Integrative Health says yoga is generally safe for healthy people when performed properly. It adds that the most common injuries are sprains and strains, and that the rate of yoga-related injuries treated in emergency departments is higher in people aged 65 and older. People with health conditions may need to modify some poses.
The same page warns that hot yoga has special risks related to overheating and dehydration, and says to avoid it while pregnant. That is one more reason we teach camel pose at room temperature at home.
What we do not claim
Searches for camel pose promise everything from a smaller waist to a taller body. We do not make those claims here. Camel pose is a stretch for the front of the body and a strengthening move for the back, and we judge it by how your hips, breath and neck behave. If you have pain, speak to a healthcare professional first.
How Mr. Ian Terry Teaches Cueing
Mr. Ian Terry, E-RYT 500, has more than 12,000 teaching hours. He trained for five years, from 2014 to 2019, with the founder of the Original Hot 26&2 method. For a posture like camel pose, that background shows up in how trainees learn to speak.
Trainees practise naming where the hips should travel, when the head should follow and when a student should come up early. In the posture clinic, they track each posture on a wall chart and fix one cue at a time. A video cannot tell which cue a student needed, but a trained voice can.
That is also why this lesson gives you a script. When you can say the seven lines from memory, you can check your own camel pose, and later you can cue a friend. To see how the same shape sits inside a full class, read how camel pose sits in a full 26 and 2 class.
A Twelve-Minute Home Routine Around Camel Pose
Camel pose works best as one part of a short session. Here is a simple plan for a room-temperature floor with a mat and a folded blanket. You do not need any other equipment.
Minutes 1 to 4: Walk briskly or march on the spot. Add arm circles.
Minutes 5 to 6: Do four standing side stretches to each side, slowly and without bouncing.
Minutes 7 to 8: Kneel and read lines one to four aloud. Practise the hip press with your hands on your lower back.
Minutes 9 to 10: Do two rounds of camel pose on rung one or two. Hold for three breaths each time.
Minutes 11 to 12: Sit back on your heels, then lie down and breathe. Say line seven on the way up.
Do this two or three times a week and keep a one-line note after each session. For instance: "hips stayed forward, neck felt long." After a fortnight, the notes show you the pattern. Drink water before you start, and stop if you feel dizzy. You do not need to heat the room, and you should not.
What YogaFX Students Say
Instructions tell you what to do. Students tell you how it feels to learn it. Here are three reviews from people who trained with YogaFX.
“The course was transformative for me, not just professionally, but personally too.”
Mayuri, Google review, 2026
“He is really patient and energetic. Love it.”
Udes, Google review, 2020 (about Mr. Ian's class)
“When I first spoke to Ian I knew it was the right program. I made the right choice.”
If this lesson made you curious about the spoken method, the next step is our hot yoga teacher training online course. It teaches the postures, the dialogue and the science from home, on your own schedule, led by Mr. Ian Terry. The course costs USD 329, or four payments of USD 82.
Since 2017, YogaFX has trained more than 1,500 graduates from over 80 countries.
FAQ
Is camel pose safe for beginners?
Camel pose is safe for most healthy beginners when they stay at a modest depth. Keep your hands on your lower back, press the hips forward and let the head follow only if the neck feels free. Come up slowly, and check with a healthcare professional first if you have a back or neck problem.
How long should you hold camel pose?
Hold camel pose for three to five slow breaths, then sit back on your heels and rest. Repeat once. Short holds with good form teach more than one long hold. If your lower back pinches, your throat feels squeezed or you feel dizzy, come up at once and rest.
Why does camel pose make me dizzy?
Dizziness can come from low fluids, a held breath, a long hold or coming up too fast. Mayo Clinic links lightheadedness to changing position quickly and to dehydration. Come up slowly with the chest first, sit for three breaths and sip water. Stop for the day if it stays.
Can you do camel pose at home with blocks?
Yes. Place a block beside each heel and reach for the blocks instead of the feet. This keeps the chest high and the hips forward when your hands cannot reach the heels yet. Use a folded blanket under the knees, practise on a non-slip mat and go slowly.
Why does camel pose hurt my lower back?
Lower back pain in camel pose usually means the hips stayed behind the knees, so the bend landed in one spot. Press the hips forward, lift the chest first and keep your hands on your back. If the pain is sharp, tingles or does not settle, stop and speak to a healthcare professional.
Still have questions? Message Mr. Ian and the YogaFX team on WhatsApp and we will answer them personally.
To learn triangle pose at home, set a wide stance, turn the front foot out, bend the front knee, send the hips back and reach the top arm long. Warm up first and stop at pain, not at tension. This guide, shaped by Mr. Ian Terry's teaching, gives seven cues you can check on your own.
Triangle pose (Trikanasana in the 26&2 sequence, often written Trikonasana elsewhere) looks calm from across a room. Up close it is a deep lunge, a long spine and a twist of attention all at once. That is why it is a great posture to study slowly at home before you ever meet it in a heated studio.
Triangle Pose Step by Step: The 7 Cues at a Glance
Here is the whole posture in seven plain-language cues. We do not print the live dialogue, because it is taught word for word in class. Instead, this is a map of what each cue asks your body to do, in the order you meet it.
Build a wide base. Step your feet far apart, so the front knee can bend without the back leg giving up.
Turn the front foot out. The front toes point to the side, and the back foot stays nearly straight ahead.
Raise both arms. Lift them to shoulder height and grow tall before you move.
Bend the front knee. Track it over the middle of the foot, while the back leg stays straight and strong.
Send the hips back. This gives the chest room to open instead of folding forward.
Reach with the top arm. Keep it long beside the ear, so one line runs from the back foot to the fingertips.
Look up and breathe. Turn the gaze only as far as the neck allows, then breathe slowly through the hold.
Each cue fixes the one before it. The wide base makes the knee bend possible, and the knee bend makes the hips and chest work. Skip one, and the whole shape wobbles.
7
Cues
From base to gaze, in one fixed order.
2
Sets per side
Compare set one with set two.
90
Minute class
Triangle pose sits late in the standing series.
40°C
Studio heat
Do not copy it at home. Practise at room temperature.
Zone 3-4
Working effort
Our estimate for the studio, not a measurement.
Source: YogaFX class format (90 minutes, about 40°C, 40% humidity, two sets per side); YogaFX working effort estimate, November 2026.
Where Triangle Pose Sits in the 26&2 Sequence
A 26&2 class is 26 postures and 2 breathing exercises, always in the same order. Triangle pose comes late in the standing series. It follows Standing Separate Leg Stretching and arrives just before Standing Separate Leg Head to Knee. By then your legs are warm, which is exactly why the deep knee bend feels so honest.
You can see the whole order on our 26&2 poses page. If you want to study the full set one posture at a time, our guide to the 26 postures at home walks through them step by step.
The same posture exists in many styles, so the name can mislead you. Our sister site explains how the posture is taught cue by cue inside the studio class, in its triangle pose cue-by-cue guide. This page does the opposite job: it shows you how to rehearse it on your own floor.
How to Set Up Triangle Pose at Home
A studio has mirrors, a teacher and a warm room. At home, you have to build those three things yourself. The table below shows how, using only objects you already own.
Studio feature
Home substitute
What to check
Stop signal
Mirror
A phone propped at hip height, filming from the front
Does the front knee track over the middle of the foot?
The knee caves inward on the replay
Teacher's eyes
A wall behind your back heel
Do the hips travel back toward the wall, not forward?
Your lower back pinches
Warm room
5 to 10 minutes of walking before you stretch
Do your legs feel warm and loose?
Any sharp or pulling pain
Fixed stance
Two strips of tape on the floor, one for each foot
Is the stance wide enough to bend the front knee fully?
You wobble or the back leg bends
Towel on the mat
A non-slip mat with a towel on top
Do the feet grip without sliding?
Your feet slip as you bend
Table 1. Home substitutes for the four things a studio gives you. Source: YogaFX home practice notes, November 2026.
Warm up first. Mayo Clinic warns that you may hurt yourself if you stretch cold muscles, and it suggests light walking or jogging for 5 to 10 minutes first. Harvard Health gives the same 5 to 10 minutes of light activity, such as a quick walk.
The standing series in a YogaFX class in Bali.
The 7 Cues, Explained for a Home Learner
Now take each cue slowly. Spend a few breaths on every one before you add the next. In class, always follow your teacher and the full dialogue, because this section is a study aid, not a replacement.
Cues 1 to 3: Base, foot and arms
Start with the stance, because every other cue depends on it. If your feet are too close, the front knee drifts past the toes. If they are too far apart, you cannot hold the back leg straight. Test it by bending the front knee a little: you should feel both feet heavy and level.
Next, turn the front foot out so the knee and the hip point the same way. A foot that points forward while the knee turns out is a common source of knee strain. Then lift both arms and grow tall. Standing tall first gives the spine room to stay long later.
Cues 4 and 5: Knee and hips
The knee bend is where the work begins. Bend the front knee over the ankle while the back leg stays straight and strong. You should feel a strong burn in the front thigh and glute. Because that burn builds quickly, count your breaths instead of your seconds.
Then send the hips back. This is the cue most beginners miss, since the natural instinct is to push the hips toward the front foot. Use the wall behind your back heel as a guide. Your seat should travel toward it, and the chest should turn open instead of dropping toward the floor.
Cues 6 and 7: Reach, gaze and breath
Reach the top arm past the ear and keep it straight. The shoulder should stay away from the ear, not shrug toward it. Finally, turn the gaze up past the top arm. Let the eyes find a point first, and let the head follow only as far as your neck is comfortable.
Breathe slowly while you hold. A held breath tightens the whole body, so lengthen the exhale and let the shoulders drop. Mayo Clinic adds two rules that fit this posture well: stretch in a smooth movement without bouncing, and expect tension, not pain. If it hurts, you have pushed too far.
Triangle Pose Mistakes You Can Catch on Camera
Filming yourself is the closest thing to a studio mirror. Watch the replay for these four faults. Each one has a first fix that works without a teacher in the room.
The front knee falls inward. Press it gently toward the little-toe side of the foot.
The chest tips toward the floor. Send the hips back again and lift the breastbone.
The back leg softens. Push through the outer edge of the back foot and straighten the knee.
The neck cranks upward. Shorten the gaze and keep the back of the neck long.
For example, a student who locks the back knee often feels it behind the knee after practice. A soft but active back leg is safer and still works the inner thigh. If any joint pain appears, come out of the posture slowly and rest.
Zone 3-4 Effort: What to Expect and How to Pace It
Triangle pose feels harder than it looks because three things stack up: a deep knee bend, a long hold and steady breathing. On our working map of a studio class, it sits in heart rate Zone 3 to 4, roughly 70 to 90% of your maximum. That is a YogaFX estimate, not a measurement of this posture alone.
At home, without the heat, the effort will usually feel lower. That is a good thing. It lets you focus on shape before you add intensity. If you want to understand how the zones work, read our guide to hot yoga heart rate zones.
For context on the whole class, a 2014 University of Wisconsin study (Porcari et al.) measured about 333 kcal for women and 460 kcal for men in a 90-minute hot class. That figure covers the full class, not triangle pose alone.
Version
Front knee
Lower hand
Best for
Full shape
Deep bend over the ankle
Reaches toward the floor beside the front foot
Warm legs and no knee or hip pain
Shallow bend
Half-depth bend
Rests on the shin
Tight hips or a first week of practice
Block version
Moderate bend
Rests on a block or a stack of books
Short arms or tight hamstrings
Wall version
Moderate bend
Free, with the back against a wall
Balance worries and hip alignment
Table 2. Four home versions of triangle pose, from easiest to fullest. Source: YogaFX home practice notes, November 2026.
Choose the version that lets you keep the cues, not the one that looks the deepest. Tension is a useful signal. Pain is a stop sign. If you have a knee, hip, back or neck problem, high or low blood pressure, or you feel dizzy, speak to a healthcare professional first. This guide is general information, not medical advice.
A 20-Minute Home Plan for Triangle Pose
You do not need a long session. A short, repeatable routine beats one heroic effort. Harvard Health says stretching keeps muscles flexible and recommends a program of daily stretches, or at least three or four times a week.
Minutes 1 to 7: Walk, then march in place until your legs feel warm.
Minutes 8 to 10: Practise the wide stance and the front foot turn, with no bend yet.
Minutes 11 to 17: Do two sets of triangle pose on each side, in the easiest version that keeps your cues.
Minutes 18 to 20: Stand quietly, breathe, and watch your phone replay.
Keep the heat out of it. Practise at normal room temperature, with a window slightly open and water nearby. Never use a fuel-burning heater to imitate the studio. Our hot yoga online guide lists five home safety rules in full.
The studio is where you test what you learned at home.
How Mr. Ian Terry Teaches Triangle Pose to Trainees
Mr. Ian Terry, E-RYT 500, has more than 12,000 teaching hours. He trained for five years, from 2014 to 2019, with the founder of the Bikram Hot 26&2 method, and he founded YogaFX in Bali in 2017. For a posture like triangle pose, that background shows in how trainees learn to speak, not only how they move.
Trainees practise naming where the weight sits in the front foot, where the knee points and where the hips drift. Then they learn to correct a misaligned student with words first. A video cannot do that, because a video cannot tell which cue the student needed. That is the gap the online course is built to close, and the Bali week closes the rest.
The online course costs USD 329, or 4 x USD 82. It includes the full dialogue workbook with MP3 audio for the standing and floor series, anatomy and posture lectures, and full demonstrations of each posture. There are no Zoom calls and no deadlines, and access does not expire. You can read the details on our hot yoga online page or go straight to the YogaFX Online Academy.
If you are curious about the next posture in the series, standing balance is a natural follow-up. Try our guide to balancing stick pose.
What Trainees Say After Learning the Postures
Students rarely describe one posture when they look back. They describe the effort, the teacher and the people around them. Here are three reviews from YogaFX students, with first names only.
I was able, day by day, to see significant improvements on my strength and flexibility and I got also the opportunity to get connected with amazing people.
Cinzia, Google review, 2022
Thank you for pushing us, giving this wonderful experience. It has been life-changing.
Fabiola's graduation video is below. It is a 31-second clip from the YogaFX YouTube channel.
A graduating group after their last class.
When You Are Ready to Feel It in a Heated Room
Home practice is a rehearsal. The heat, the pace of a full room and a teacher watching your knees only exist in the studio. When you are ready, the YogaFX studio in Seminyak, Bali, offers a Free 1-Day Guest Pass, so your first class is free. The address is Jl. Pangkungsari Gg Jepun No.888, Kuta Utara, Seminyak, Badung, Bali 80361.
Two sets on each side is the point. The second set shows you what you changed in the first. At home, your phone shows you the same thing, only more slowly.
FAQ
How do you do triangle pose step by step?
Step your feet wide, turn the front foot out, lift your arms, bend the front knee, send the hips back, reach the top arm past the ear, then look up and breathe slowly. Warm up first, avoid bouncing, and stop if you feel pain instead of tension.
How do you modify triangle pose if your hamstrings are tight?
Keep the front knee bent more deeply than feels needed, and rest the lower hand on your shin, a block or a stack of books instead of reaching for the floor. Keep the spine long. A modified shape that keeps the cues is better than a deep shape that loses them.
Can you practise triangle pose at home without a heated room?
Yes. Practise at normal room temperature after a 5 to 10 minute walk to warm your muscles. The studio is about 40°C (104°F) with 40% humidity, which is hard to copy safely at home. Never use a fuel-burning heater, and keep water nearby.
Is triangle pose safe for your knees?
It can be, when the front knee tracks over the middle of the foot and the foot turns out with it. Knee strain often comes from a knee that falls inward. If you have a knee injury, speak to a healthcare professional first and tell your teacher before class.
How often should you practise triangle pose at home?
Three or four short sessions a week is a reasonable start. Harvard Health suggests stretching daily, or at least three or four times a week. Keep each session to about 20 minutes, include a warm-up, and rest when your legs feel heavy.
Still have questions? Message Mr. Ian and the YogaFX team on WhatsApp and we will answer them personally.
Cobra pose (Bhujangasana) is a floor backbend you can learn at home from a spoken script. You lie on your belly, lift your chest with your back muscles, and keep your hips on the floor. This cobra pose online lesson gives you seven cues to say aloud, the errors to watch for and a safe lift height.
A quick note before we start, because it matters. This is general information, not medical advice. If you have a back, neck or shoulder problem, a recent injury, or you are pregnant, please consult a healthcare professional before you practise.
Cobra Pose Online Lesson: What You Are Learning
Cobra pose looks gentle, so most people rush it, and that is where trouble starts. In fact it asks three things at once: strong back muscles, quiet shoulders and hips that stay put. A camera cannot check those three for you. A spoken script can, because you hear each cue in order and check your body against it.
That is why we teach it as a lesson with a script and not as a photo to copy. You read one line, move, then read the next line. After a few rounds, the lines live in your head and you start cueing yourself.
Where cobra pose sits in the floor series
In the Original Hot 26&2 sequence, cobra pose is the first floor backbend. It arrives after a forward fold, so your spine has just been bent one way and now has to reverse. Our page on the 26&2 poses shows the full class order, so you can see what comes before and after.
At home you will practise it at room temperature. That is deliberate. You learn the shape and the cues first, and you add heat later in a studio if you choose to.
Why the name helps
Bhujangasana comes from bhujanga, the Sanskrit word for snake. Picture a snake raising its head while the body stays low. The head and chest rise, and the belly, hips and legs stay grounded. If you remember only one image, keep that one.
The Seven-Line Home Script for Cobra Pose
How to use the script
Read each line aloud, or record yourself saying it, then do what it says. Pause for one breath between lines. This is our own plain-language script for home study. It is not the class dialogue, which is taught live. If you are curious how a spoken dialogue is learned, our guide to the Bikram yoga dialogue explains the method.
Line
What you say aloud
What it protects
Error it catches
1
Lie face down, legs together, tops of the feet pressing into the floor.
Gives the lower body a firm base
Legs fall apart, feet roll out
2
Hands under your shoulders, elbows hugging your ribs.
Makes the arms a rail, not a lever
Hands too far forward, arms lock early
3
Breathe in and lift your chest with your back, hands light.
Trains the spine to extend with its own strength
Shoving up with straight arms
4
Hips stay heavy on the floor.
Spreads the bend across the whole spine
Hip bones lift, lower back folds sharply
5
Slide your shoulder blades down toward your hips.
Opens the chest and frees the neck
Shoulders shrug up to the ears
6
Eyes look slightly up, neck long.
Keeps the neck in line with the spine
Head thrown back, neck crushed
7
Breathe out and lower slowly, cheek to the floor.
Lets the back muscles release in one line
Dropping fast, holding the breath
Table 1. Seven cobra pose cues in plain words, what each protects and the error it catches. Written for home study by the YogaFX team.
Notice how each line protects the next. The legs make the base, the base lets the back lift, and the hips on the floor keep the bend in the upper back. Take one line out and the shape changes.
Hold time and rounds
Hold the top position for 10 to 15 seconds, breathing slowly. Then rest with your cheek on the floor for a few breaths and repeat once. Two rounds teach more than one long hold, because the first round shows you where you collapse and the second lets you fix it.
Hand Placement, Hip Contact and a Safe Lift Height
Two placements decide most of the shape. First, the hands. Set them under the shoulders, not beside the face and not far forward. If the hands sit too far ahead, the elbows straighten early and the lower back takes the load.
Second, the hips. Press the front of the pelvis into the floor and keep it there. If you feel your hip bones lifting away, lower the chest and start again. Depth does not matter here. Control does.
Step 1: Hover
Floor cobra
Chest barely leaves the floor, elbows bent, hands light. Start every week here.
Step 2: Low
Low cobra
The chest rises a hand's width. The back works, the neck stays long.
Step 3: Working
Mid cobra
Lower ribs lift. The front of the hips still touch the floor and the breath stays slow.
Stop sign
Come down
Hip bones lift, you feel a pinch in the lower back, or you feel tingling. Rest and ask for advice.
A safe lift height ladder for cobra pose at home. Sources: YogaFX online lesson notes; injury and modification guidance from the National Center for Complementary and Integrative Health (NCCIH), 2024.
Move up the ladder only when the step below feels steady. Many people stay at step one or two for weeks and still feel a clear stretch across the front of the hips. If a week feels worse than the last, go lower without any guilt.
Benefits of Cobra Pose: What to Expect and What Not to Expect
People ask about the benefits of cobra pose more than any other detail, so here is a grounded answer. These are the effects students tell us they notice, not medical claims.
A clear stretch across the front of the hips and chest. Long hours of sitting shorten that area, and a low lift lengthens it gently.
Awareness of the back muscles. Many beginners meet their mid back for the first time in this pose.
A calmer shoulder position. Sliding the shoulder blades down teaches you where "relaxed" sits.
A simple breathing anchor. The lift happens on the in-breath and the release on the out-breath, which keeps the mind on one job.
What you should not expect is a quick fix for pain, posture or height. Searches for the benefits of cobra pose often promise those. We would rather you build a steady home practice and judge the results yourself after a few weeks.
Six Cobra Pose Errors a Camera Cannot Catch
Most cobra pose mistakes come from chasing height. People see the head rise and think higher is better. Here are the six we see most often, with the first fix to try.
Pushing up with straight arms. Bend the elbows and let the back muscles lead the first part of the lift.
Hips lifting off the floor. Press the pelvis down and lower the chest until the hips feel heavy.
Shoulders shrugged to the ears. Slide the shoulder blades down the back and lengthen the neck.
Neck thrown back. Keep the chin close to level with the chest and look only a little way up.
Holding the breath. Breathe in as you lift, then breathe slowly while you hold, because a held breath tightens the back.
Legs apart and feet rolled out. Squeeze the legs together and press the tops of the feet down.
Problem solver: what you feel and what to change
What you feel
Likely cause
First fix to try
Pinch in the lower back
Hips lifted or arms pushing too hard
Lower the chest, press the pelvis down, bend the elbows
Sore neck
Head thrown back
Lengthen the back of the neck and look only slightly up
Tired wrists
Hands too far forward, weight in the palms
Move the hands under the shoulders and keep them light
Nothing in the back muscles
Arms doing the work
Hover the hands for one breath and let the back lift alone
Dizzy or short of breath
Held breath or a long hold
Come down, rest, and shorten the hold next round
Table 2. A quick cobra pose problem solver. Stop and seek advice if pain is sharp or does not ease.
For example, a student who always feels cobra pose in the lower back is usually pushing with the arms and lifting the hips together. A lower lift with the elbows bent fixes both at once.
Rest matters as much as the lift. After each round you lie still and let the breath settle. Our guide to why final rest matters after heat explains what that stillness does for you.
What the Research Says About Yoga and Back Care
Yoga and chronic low back pain
Cobra pose is a back extension, so people ask whether it helps back pain. The honest answer is: it may, a little, and the evidence is modest. The US National Center for Complementary and Integrative Health reports that the 2017 American College of Physicians guideline strongly recommended yoga, based on low-quality evidence, as initial treatment for chronic low back pain.
The same NCCIH digest, "Yoga for Pain: What the Science Says" also cites a 2022 Cochrane review. It found low-to-moderate certainty that yoga gives only small and clinically unimportant gains in back-related function and pain compared with no exercise. In other words, yoga is a reasonable choice, not a miracle.
Why we do not oversell one pose
A 2006 systematic review in Spine pooled eleven trials of the McKenzie method, a structured exercise approach for low back pain. Machado and colleagues found some evidence of benefit over passive therapy in acute pain at one week, about 4 points on a 100-point scale. The authors judged that the difference suggests the absence of clinically worthwhile effects. You can read the abstract on PubMed.
So here is what we take from both sources. Exercise and yoga are safe, sensible tools for most healthy people. They are not a promise. That is why our cues focus on control and a modest lift, not on how high you can go.
Safety first
NCCIH says yoga is generally safe for healthy people when performed properly under the guidance of a qualified instructor. It adds that injuries can occur, and that the most common are sprains and strains. People with health conditions, older adults and pregnant women may need to avoid or modify some poses. Stop if you feel sharp pain, pinching or tingling, and see a healthcare professional if it does not settle.
Why Teachers Say the Cues Out Loud
Mr. Ian Terry, E-RYT 500, has more than 12,000 teaching hours. He trained for five years, from 2014 to 2019, with the founder of the Original Hot 26&2 method. For a floor posture like cobra pose, that background shows up in how trainees learn to speak.
Trainees practise naming where the hands sit, where the hips must stay and when a student has lifted too high. During the posture clinic, they track each posture on a wall chart and fix one cue at a time. A video cannot tell which cue a student needed, but a trained voice can.
That is also why this lesson gives you a script. When you can say the seven lines from memory, you can check your own cobra pose, and later you can cue a friend. If you want to see how the same cues sit inside a full class, the studio-side 26 and 2 guide to cobra pose covers the class order and a depth ladder.
A Ten-Minute Home Routine Around Cobra Pose
Cobra pose works best as one part of a short session. Here is a simple plan for a home practice on a room-temperature floor with a towel or mat. You don't need any other equipment.
Minutes 1 to 2: Lie face down and breathe slowly. Read lines one and two aloud.
Minutes 3 to 5: Do two rounds of floor cobra with a 10-second hold and a rest between.
Minutes 6 to 8: Move up to low cobra for two rounds. Say lines three to six as you go.
Minutes 9 to 10: Lie still, turn the head to one side and breathe. Say line seven on the way down.
Do this three times a week and keep a one-line note after each session. For instance: "hips stayed down, neck sore." After two weeks, the notes show you the pattern. If you want more floor and standing postures to join it, read our guide to hot yoga poses for men. It places cobra pose inside a four-week plan.
Drink water before you start and stop if you feel dizzy. You do not need to heat the room, and you should not.
What YogaFX Students Say
Instructions tell you what to do. Students tell you how it feels to learn it. Here are three reviews from people who trained with YogaFX.
“Super fantastic, simple pose but very hard.” She also called Mr. Ian a kind and charismatic teacher (paraphrased).
Lidya, Google review, 2022
“Any age is not a limit. I am over 60 and I did it and I’m so proud of myself.”
Margarita, YouTube review, 2024
“I’m very grateful… you all inspire me to do more and better.”
If this lesson made you curious about the spoken method, the next step is our hot yoga teacher training online course. It teaches the postures, the dialogue and the science from home, on your own schedule, led by Mr. Ian Terry. The course costs USD 329, or four payments of USD 82.
Since 2017, YogaFX has trained more than 1,500 graduates from over 80 countries.
FAQ
How long should you hold cobra pose?
Hold cobra pose for 10 to 15 seconds while you breathe slowly. Then lower, rest for a few breaths and repeat once. Short holds with good form teach more than one long hold. If your lower back pinches or your arms shake, shorten the hold and lower the chest.
Is cobra pose good for lower back pain?
It may help some people, but the evidence for yoga and back pain is modest. The NCCIH reports a guideline that recommends yoga for chronic low back pain on low-quality evidence. Keep the lift low, stop at any pinching or tingling, and ask a healthcare professional first if you have pain.
Why does cobra pose hurt my lower back?
Pain usually means you lifted too high, pushed with straight arms or let your hips leave the floor. Lower the chest, bend the elbows and press the pelvis down. If the pain is sharp, does not ease or travels down a leg, stop and see a healthcare professional.
How often should I practise cobra pose?
Three short sessions a week is a sensible start for most healthy beginners. Do two rounds each time and rest between them. Keep a note of how your back and neck feel afterwards. If you feel sore the next day, take a rest day and lower your lift.
Can you do cobra pose without using your hands?
Yes, and it is a good test. Lift the chest, hover the hands just above the floor for one breath, then place them back. If your chest drops, your back muscles need more work. Practise low lifts until you can hover without losing your hips on the floor.
Still have questions? Message Mr. Ian and the YogaFX team on WhatsApp and we will answer them personally.
Balancing stick pose (Tuladandasana) is a one-leg balance where your arms, torso and lifted leg make one level line while the standing leg stays straight. You can learn the steps at home, then check your line by filming yourself from the side and the front. That camera check shows what a mirror cannot.
Most guides to balancing stick pose describe the shape and stop. The hard part online is that nobody tells you when the line has bent. In a room, a teacher sees a dropped chest in half a second. At home you have a phone, a wall and a little patience, and that is enough if you know where to look.
This guide gives you seven steps you can rehearse, a three-angle filming method, and a table that turns what your clip shows into one fix to try. It also looks at what research says about one-leg balance, video feedback and the angle of your torso. Finally, it shows where the YogaFX Online Course fits for people who want the spoken dialogue, not just the shape.
A quick note first. This is general information, not medical advice. If you have a knee, ankle, hip or back injury, or you feel dizzy standing on one leg, speak to a healthcare professional before you practise. Do all the work below at room temperature, and keep the hot room for class.
Balancing Stick Pose: The Shape and Where It Sits
Balancing stick pose (sometimes called the balancing stick posture) asks you to become a long T on one leg. The standing leg is strong and straight. The arms reach forward beside your ears, the chest tips down, and the back leg lifts until fingertips, spine and heel line up like a plank held in the air. The hard part is that all three lines have to arrive together.
The Sanskrit name is usually read as tula (balance or scale) plus danda (staff or stick). Picture a seesaw: as the chest goes down, the leg goes up, and the standing hip is the pivot.
In the Original Hot 26&2 sequence the posture sits in the standing series, after standing bow pulling pose, and like most postures it is done twice. You can see every posture in class order on our page of the 26&2 poses.
If you want the studio view of the same shape, our sister site 26and2yoga.com has a studio-side walk-through of Tuladandasana, written from a Bali class. For the wider picture of how the standing series fits together, read our guide to hot yoga poses for men.
The Steps: Seven Moves You Can Rehearse at Home
Read the list once, then try balancing stick pose slowly, one step at a time. In class, the teacher's spoken dialogue gives the exact timing, so treat these steps as a map and not as the script. Stand next to a wall for your first few tries.
Stand tall on one foot. Shift your weight onto the standing foot and spread the sole across the ball and the heel.
Pick a fixed spot. Look at one point at eye level, such as a mark on the wall. Steady eyes make a steadier body.
Lock the standing leg. Tighten the thigh until the kneecap lifts. The leg stays straight and firm, and the knee does not push backward.
Reach long. Bring the palms together and lift the arms beside your ears so that arms and ears stay in one line.
Hinge from the hip. Tip the chest forward as one piece. The movement comes from the hip joint, not from rounding the waist.
Send the back leg away. Point the lifted foot and push it back, not up, so the leg moves as the chest moves.
Hold, then rise slowly. Breathe steadily, keep your gaze fixed, and come up with control before repeating on the other side.
Start with the version you can actually hold
Hardly anyone reaches a perfectly level line on day one, and that's normal. Keep the back leg lower and the chest higher, so the lever is shorter. A soft, strong standing knee is a sensible choice if a straight knee pulls at the back of the joint. Build the full line over weeks, not in one session.
How to Film Your Line From Three Angles
A mirror helps, but you cannot watch your spine, your hips and your standing knee at the same time. A short clip can be paused, replayed and compared with last week. So filming your balancing stick pose is the closest thing to a teacher's second look that you can set up alone.
Side view. Lean the phone on a water bottle at hip height, about two metres away. This angle shows the main line from fingertips to back heel.
Front view. Move the phone to chest height. This angle shows whether the standing knee tracks over the foot and whether the shoulders stay level.
Rear view. Film from behind at hip height. This angle shows the hip bones, which is where a rolling-open lifted leg gives itself away.
Same spot, same light. Use the same place on the mat each session so the clips compare fairly, and keep the first take even when it is messy.
A teacher watching the room is the check you are rebuilding with a phone. Three short clips give you three views.
The pencil test for a straight line
Here's a simple trick we use when we talk trainees through their own clips. Pause the side view at the deepest point of your balancing stick pose. Hold a pencil against the screen from your fingertips to your back heel. If your torso and leg both sit along the pencil, the line is straight.
If your lower back sags below the pencil or your leg rises above it, the chest and the leg aren't matching each other.
That one test tells you which half of the seesaw is off. A leg above the pencil means you lifted too high for your chest. A back below the pencil usually means the hinge came from the waist. Then ask a second question about your balancing stick pose: what changed since last time? A clip is only useful as a comparison, so a slightly straighter pencil line than last week counts as real progress.
What Your Clip Shows and the Fix to Try First
Use the table below as a lookup for balancing stick pose. Find the check point, compare it with what your clip shows, then try the fix in the last column. Change one thing per session, because two changes at once hide which one worked.
Check point
Best view
A good line looks like
Red flag in the clip
First fix to try
Fingertips to heel line
Side
Arms, torso and leg sit along one level line
Lower back sags, or the heel floats above the hands
Shorten the lever: lower the leg a little and let the chest tip to match
Hip bones
Rear
Both hip bones face the floor
Lifted hip rolls open toward the ceiling
Turn the lifted toes down and rehearse with the leg only half lifted
Standing knee
Front
Straight, firm and stacked over the ankle
Knee sinks inward or shakes
Squeeze the thigh and press through the whole foot before you hinge
Shoulders and arms
Front
Arms beside the ears, shoulders level
Elbows bend and shoulders creep to the ears
Lengthen the arms forward and breathe out as you reach
Eyes and head
Side
Gaze fixed on one point, neck long
Head drops and eyes keep moving
Choose one spot on the wall at eye level and stay on it
Standing foot
Front
Toes spread and weight even across the sole
Toes grip or the ankle rolls in
Spread the toes and feel the heel and the ball press down together
Table 1. Six check points for balancing stick pose, the camera view that shows each one, and the first fix to try. Based on cues taught by Mr. Ian Terry at YogaFX.
What the table is really telling you
Notice that three of the six fixes begin at the standing foot or the standing knee. That is the main idea of balancing stick pose. If the base is solid, the long line has something to rest on. If it is not, no amount of reaching will save the shape.
Why You Wobble in Balancing Stick Pose, and Three Habits That Steady You
Wobbling isn't failure. It's your standing foot making tiny corrections, and in the early weeks you should expect plenty of them. If you shake most when the leg lifts, check that your weight is spread across the whole foot and not dumped into the toes.
Fix your eyes. Moving eyes make a moving body, so choose one spot and keep it for the whole hold.
Breathe out slowly. A long exhale lowers effort in the standing leg and helps the shaking settle.
Use the wall. Rest a fingertip on it for the first sessions, then take it away once the line stops moving.
A Bali class holding a standing posture with arms raised. The standing series warms the legs before balancing stick pose.
What Research Says About Balance, Feedback and Torso Angle
Research cannot tell you how fast you will learn this posture. It can tell you why the base skill matters, why seeing yourself helps, and why the angle of the torso changes which muscles work. Each source below has limits, so read the findings as context, not as a promise.
Balance exercises and falls
The Cleveland Clinic says that exercises that improve balance can help reduce your chances of falling. It also notes that standing on one leg can be more difficult than it sounds, and it suggests holding a chair for extra support when you first start.
Putting your arms out to help is fine too. For single-leg holds it suggests 10 seconds at a time, up to three sets. Read the full page on balance exercises at Cleveland Clinic.
That advice fits balancing stick pose well. Use the wall, let your arms reach, and build the hold slowly. There's no prize for a bare-handed first attempt in balancing stick pose.
Why filming yourself can help
A 2021 systematic review in Cureus by Moinuddin, Goel and Sethi looked at augmented feedback in motor learning. The authors concluded that multimodal augmented feedback seems to be the most effective way to give feedback during motor learning, and they called visual feedback the cornerstone of all augmented feedback types.
The review also describes a trial in which 34 older adults did slow single-leg training while watching a video screen, and their static and dynamic balance improved. You can read the full review on PubMed Central. The authors note that evidence on how often to give feedback is still thin. Our reading is simple: seeing your clip while hearing the cue gives you two inputs, not one.
Why the torso angle matters
A 2023 study in Physical Therapy Korea measured muscle activity in 21 healthy women during a single-leg deadlift at three forward trunk angles: 30, 60 and 90 degrees. Glute and hamstring activity differed across the three angles, and the glute-to-hamstring ratio was higher at 30 and 60 degrees than at 90. You can see the record in the Directory of Open Access Journals.
This was a single-leg deadlift, not balancing stick pose, so it does not prove anything about this posture. Still, the shape is similar: one leg carries you while the torso hinges forward. A level torso at about 90 degrees leans more on the hamstrings than a half-hinge does. That is our reading, and it is one more reason to build the line in stages.
Strength and flexibility in heated yoga
A 2013 controlled trial by Tracy and Hart on a heated, humidified yoga programme reported about a 20% increase in posterior chain strength, alongside changes in flexibility and body composition. We name it without a link, because we did not open the abstract page for this guide. It studied whole classes, not balancing stick pose alone, so it is a hint about regular practice, not a promise.
10 sec
One hold
Cleveland Clinic suggests 10-second single-leg holds, up to three sets.
34
Older adults
Trial in the Cureus review: video-screen feedback during single-leg training improved balance.
30, 60, 90
Trunk angles
Degrees of forward lean compared in the single-leg deadlift EMG study of 21 women.
3 views
Your camera check
Side for the line, front for the knee, rear for the hip bones.
USD 329
Online Course
Or 4 payments of USD 82 for the YogaFX Online Course.
Sources: Cleveland Clinic, balance exercises, 2025; Moinuddin, Goel and Sethi, Cureus, 2021; Physical Therapy Korea, 2023 (single-leg deadlift, not this posture); YogaFX Online Course price.
A Four-Week Home Plan for Balancing Stick Pose
You don't need a long routine for balancing stick pose. Two or three short sessions a week are plenty, with a rest day between them. Each step should feel challenging but never painful. If a joint hurts, stop and skip that step.
Week one: stand and film. Near the wall, stand on one leg for a few breaths per side and film the side view once. Keep your gaze on one fixed point.
Week two: add the reach. Lift the arms beside the ears and hold the standing leg steady. Film the front view and check the knee.
Week three: hinge halfway. Tip forward from the hip and lift the back leg only part of the way. Run the pencil test on the side clip.
Week four: build the line. Lower the chest and send the leg back until the pencil line is straight. Film all three views and compare them with week one.
Write three notes after each session: how many slow breaths you held, which fix you tried, and what the pencil test showed. After a month, read the notes in order. A pattern appears quickly. Often the standing knee firms up first and the line follows later, which is a sign you are building the pose from the right end.
How the YogaFX Online Course Fits In
A clip tells you what happened in your balancing stick pose. It can't tell you which words would have fixed it. That is where the spoken dialogue comes in. Mr. Ian Terry, E-RYT 500 with more than 12,000 teaching hours, leads the YogaFX Online Course. He trained for five years, from 2014 to 2019, with the founder of the Bikram Hot 26&2 method.
The YogaFX Online Course costs USD 329, or 4 payments of USD 82. It covers the 26 postures, the dialogue and the science at home, on your own schedule. To see how the course is laid out, start from our hot yoga teacher training online course page.
One thing we cannot describe here is the exact feedback process on your practice clips, because it can change from batch to batch. Message the team on WhatsApp and ask how it works right now. That is a better answer than a guess in a blog post.
When you want the heat and a live teacher, the next step is the six-day Bikram Hot 26&2 Yoga Teacher Training MasterClass in Bali. The next batch checks in on Sunday 24 January 2027 and checks out on Friday 29 January 2027, at Soham Wellness Center in Seminyak. The Early Bird price is US$1,899, against the normal US$1,999.
What YogaFX Graduates Say
Balancing stick pose rewards patience, and graduates often talk about the teaching more than the poses. These short quotes come from the YogaFX review store, from people who trained with Mr. Ian and the team. First names only, with the source and year.
“Highly knowledgeable and competent teachers will change yourself for the better.”
Thibaut, Google review, 2018
“The training was tough but so rewarding and we got to meet and become friends with some incredible people from all parts of the world.”
Samantha, Google review, 2025
“this is actually quite life-changing for me”
Anne, YouTube review, 2025
Anne's short video review is below. She explains how she found the training and how she felt about it afterwards, which is a useful frame for any pose that humbles you at first.
Anne, YouTube review, 2025: a 40-second message after her teacher training.Teacher training students on the final class in Bali. Everyone follows the same spoken cues, which is why a clip is easy to compare with the cue.
Who Should Check With a Professional First
Balancing on one leg loads the knee, hip and ankle of the standing side, and it asks the back to stay long. So a few people should get advice before they start.
Joint injuries. Anyone with a current knee, ankle, hip or back problem should talk to a healthcare professional first.
Dizziness. If standing on one leg makes you dizzy, stop and get it checked before you practise again.
Heat concerns. If you plan to move from home practice into a hot room, check how your body copes with heat first, and ask your doctor if you are unsure.
A stretch in the back of the lifted leg is normal in balancing stick pose. A sharp pain behind the standing knee is not. Take the slower route, and tell your teacher about any injury before class.
FAQ
Can I learn balancing stick pose online?
Yes, you can learn the steps, the order of the cues and the common fixes online. Film yourself from the side, front and rear, then compare each clip with the cue. A video cannot replace a teacher's eyes in the room, so keep your goals modest and ask for feedback whenever you can.
How do I check my balancing stick pose alignment on camera?
Film a side view at hip height and pause at the deepest point. Hold a pencil against the screen from fingertips to back heel. If your torso and leg both follow it, the line is straight. A front view then checks the standing knee, and a rear view checks the hips.
How long should I hold balancing stick pose at home?
Start with a few slow breaths per side and stop before your form slips. Cleveland Clinic suggests 10-second single-leg holds, up to three sets, for general balance work. Add a breath or two over several sessions, rest between sides, and stop if a joint hurts.
What is an easier balancing stick pose variation for tight hamstrings?
Keep the back leg lower and the chest higher so the lever is shorter. Soften the standing knee slightly if the straight leg pulls behind it, and rest a fingertip on a wall. Raise the leg and lower the chest in small steps over several weeks as the hamstrings loosen.
How much does the online course cost?
The YogaFX Online Course costs USD 329, or 4 payments of USD 82. It covers the 26 postures, the spoken dialogue and the science at home, led by Mr. Ian Terry, E-RYT 500. Message the team on WhatsApp to ask how feedback on your own practice clips works before you buy.
Still have questions? Message Mr. Ian and the YogaFX team on WhatsApp and we will answer them personally.
Standing head to knee pose (Dandayamana Janushirasana) is a one-leg balance. You lock the standing knee, kick the other leg straight in front of you, and fold your forehead toward the knee. You can learn the steps at home, then fix the usual errors by filming yourself and checking the clip against the cue.
Most guides show the shape and stop there. The hard part online is that nobody tells you when you have drifted. A teacher in a room spots a sagging hip in half a second. At home you have a mirror, a phone and your own honest eyes, and that is enough if you know what to look for.
This guide to standing head to knee pose gives you six steps you can rehearse, a simple phone-camera method, and a table that turns what you see into a fix. It also covers what research says about one-leg balance and feedback. Finally, it shows where the YogaFX Online Course fits, for people who want the spoken dialogue and not only the shape.
A quick note first. This is general information, not medical advice. If you have a knee, hip, ankle or back injury, or you feel dizzy standing on one leg, speak to a healthcare professional before you practise. Do all the work below at room temperature, and keep the hot room for class.
Standing Head to Knee Pose: What You Are Really Learning
Standing head to knee pose asks for three things at once: a strong standing leg, a straight lifted leg and a fold that starts from the hips. Each part is easy alone. The pose feels hard because you stack all three on one foot. That is why a calm, step-by-step build beats a big push toward the knee.
The Sanskrit name is a plain description. Dandayamana means standing, janu means knee, shirsha means head and asana means pose. In the Original Hot 26&2 sequence it sits in the standing series, and like most postures it is done twice on each side. You can see every posture in class order on our page of the 26&2 poses.
Some people search for it as head to knee pose. That phrase also names the seated forward fold, so check which one a video shows. In the standing version one leg carries your whole weight. If you want the hamstring side of the story, our guide to hot yoga poses for men places this pose beside the other two head-to-knee postures.
The Steps: Six Moves You Can Rehearse at Home
Read the list once, then do standing head to knee pose slowly. In class, the teacher's spoken dialogue gives the exact timing, so treat these steps as a map and not as the script. Stand near a wall for your first few tries.
Set the standing leg. Put your feet together, shift your weight onto one foot and pick one fixed spot at eye level.
Lift and grip. Raise the other knee, wrap both hands around the foot and interlock your fingers under the ball of the foot.
Lock the standing knee. Tighten the thigh so the kneecap lifts. The leg stays straight and firm, but the knee does not push backward.
Kick forward. Straighten the lifted leg in front of you, push the heel away and keep both hip bones facing the front.
Fold with a long spine. Bend the elbows down, keep the chest tall and let the forehead move toward the knee only as far as the back stays long.
Come out slowly. Lift the head, release the foot, set it down and repeat on the other side.
Most people cannot straighten the leg or reach the knee in standing head to knee pose on day one, and that is normal. Hold the foot with a bent knee and keep the chest tall. Then straighten in small stages. A steady, shorter shape teaches your body more than a wobbly full one.
How to Film Yourself So the Clip Tells the Truth
A mirror helps, but you cannot watch your hip, your knee and your foot at the same time. A short clip can be paused, replayed and compared with last week. So filming your standing head to knee pose is the closest thing to a teacher's second look that you can set up alone.
Side view. Lean the phone against a water bottle at hip height, about two metres away, and film each side once for 20 to 30 seconds.
Front view. Move the phone to chest height and film the same two sides again.
Same spot, same light. Use the same place on your mat each session so clips compare fairly.
No editing. Keep the first take, even when it is messy, because the messy clip is the useful one.
One-leg balance is the base skill. Practise it before you add the kick and the fold.
Three checks for every clip
Watch the clip once with the sound off and look for just three things. First, is the standing knee straight and firm? Second, are both hip bones facing the front? Third, is the chest tall as the head comes forward? Those three checks catch most of what a teacher would correct.
Then ask one question about your standing head to knee pose: what changed since last time? A clip is only useful as a comparison. If the standing knee looks firmer than last week, you have progress even if the foot has not moved an inch.
What Your Clip Shows and the Fix to Try First
Use the table below as a lookup for standing head to knee pose. Find what you see in the clip, read the likely cause, then try the cue in the last column. Change one thing per session, because two changes at once hide which one worked.
What the clip shows
Best view
Likely cause
First fix to try
Standing knee bends and the hip sags behind the foot
Side
The thigh has let go
Squeeze the thigh and lift the kneecap before you raise the other foot
Lifted knee drops below hip height
Side
Hamstrings at their limit, or the grip is too low
Hold the foot with a bent knee, then straighten in three small steps
One hip rides up or the pelvis twists open
Front
Hips are not square
Point both hip bones at the camera and rehearse without the fold first
Back rounds and the chin drops toward the chest
Side
Chasing the forehead instead of the shape
Lift the chest first and fold only as far as the spine stays long
Standing foot grips with the toes or the ankle rolls in
Front
Weight has slid into the toes
Spread the toes and press down through the whole foot
Shoulders creep toward the ears and the jaw tightens
Either
Held breath
Breathe out slowly as you fold and let the shoulders drop
Eyes keep moving and the whole body shakes
Front
No fixed point to steady on
Choose one spot at eye level and stay on it
Table 1. Seven things a phone clip can show in standing head to knee pose, the likely cause and the first fix. Based on cues taught by Mr. Ian Terry at YogaFX.
What the table is really telling you
Notice that most fixes start at the standing foot, not at the lifted leg. That is the main idea of standing head to knee pose. If the base is solid, the kick and the fold have something to stand on. If it is not, no amount of reaching will save the shape.
Three Home Drills for Standing Head to Knee Pose
The standing leg will not lock
Stand side-on to a wall and rest your fingertips on it. Squeeze the thigh of the standing leg until the kneecap lifts, and hold for five slow breaths. Then lift the other foot a few centimetres and hold again. This teaches your leg what a firm knee feels like before the weight of the kick arrives.
The hamstrings will not straighten
Stage the kick instead of forcing it. Hold the foot with a bent knee, straighten a little, pause, then straighten a little more. Stop at the point where the spine is still long. Never bounce. A looped towel around the foot is a handy home aid while you learn, though it is not part of the class.
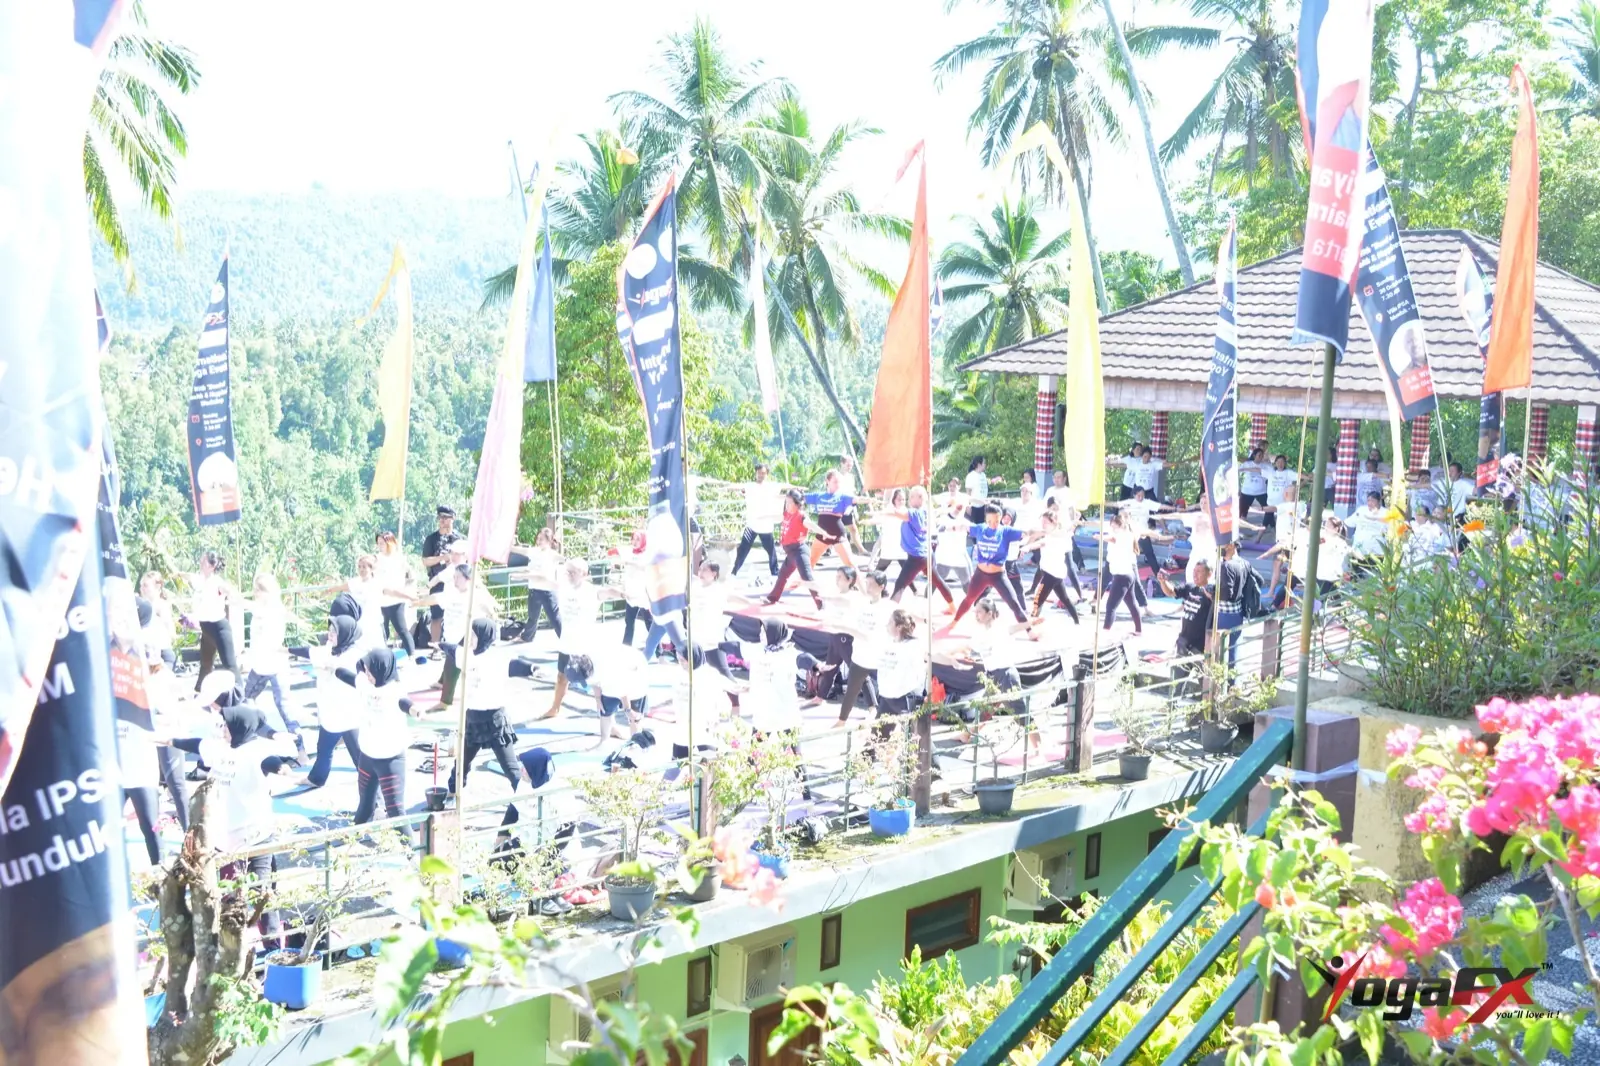
Group practice on a Bali terrace. Everyone follows the same spoken cues, which is why a clip is easy to compare with the cue.
The hips twist open
Place your hands on your hip bones in a short rehearsal with no kick at all. Feel both bones point forward, then lift the foot while keeping that feeling. Film the front view afterwards. If one side rides up, return to the bent-knee version and rebuild from there.
Other one-leg postures train the same base, so they help here too. Standing bow pulling pose, for instance, asks for a firm standing leg and a steady gaze, just as this posture does.
Standing bow pulling pose is another one-leg balance from the same standing series.
A Weekly Self-Check Loop for Standing Head to Knee Pose
You do not need a long routine. Three short sessions a week are enough, with a rest day between them. The loop below keeps each session focused and gives you something to compare next week.
Rehearse without filming. Spend a few minutes on the standing leg and the bent-knee version, with the wall nearby.
Film one clip per side. Use the side view one session and the front view the next.
Pick one fix. Choose the single row of the table that matches your clip and try only that cue next time.
Write three notes. Record how many slow breaths you held, how high the knee reached and which fix you tried.
After a few weeks, read your notes in order. The numbers will be small, but a pattern appears quickly. Perhaps the standing knee firms up first, and the kick follows later. That order is common, and it is a sign that you are building the pose from the right end.
What Research Says About One-Leg Balance and Feedback
Research cannot tell you how fast you will learn this posture. It can tell you why the base skill matters and why seeing yourself helps. Each study below has limits, so read the findings as context, not as a promise.
A 10-second one-leg stance and long-term health
A 2022 cohort study in the British Journal of Sports Medicine followed 1,702 adults aged 51 to 75. Araujo and colleagues found that people who could not hold a one-legged stance for 10 seconds had a higher risk of death from any cause over a median follow-up of 7 years. In an adjusted model, the hazard ratio was 1.84. You can read the abstract on the BMJ site.
This was an observational study, so it shows an association, not a cause. The authors also note that uncontrolled factors, such as recent falls and physical activity, could play a part. It does not say that practising standing head to knee pose will extend anyone's life. It does suggest that steady one-leg balance is a skill worth keeping.
1,702
Adults followed
Aged 51 to 75 in the Araujo cohort, followed for a median of 7 years.
10 seconds
The balance test
Stand on one leg for 10 seconds without support.
17.5% vs 4.6%
Died in follow-up
Share of those who failed the test against those who passed it.
HR 1.84
Adjusted risk
Higher all-cause mortality for those who failed, after adjusting for age, sex, BMI and illness.
USD 329
Online Course
Or 4 payments of USD 82 for the YogaFX Online Course.
Sources: Araujo et al., British Journal of Sports Medicine, 2022 (an association, not proof of cause); YogaFX Online Course price.
Balance training and falls
The Cleveland Clinic says that exercises that improve balance can help reduce your chances of falling. It also notes that standing on one leg can be harder than it sounds, and it suggests holding a chair for extra support when you first start. Putting your arms out to help is fine too. Read the full page on balance exercises at Cleveland Clinic.
That advice fits standing head to knee pose well. Use the wall, hold your arms out if you need to, and build up slowly. There is no prize for a bare-handed first attempt.
Why filming yourself can help
A 2021 systematic review in Cureus by Moinuddin, Goel and Sethi looked at augmented feedback in motor learning. The authors concluded that multimodal feedback seems to be the most effective way to give feedback while people learn a movement, and they called visual feedback the cornerstone of augmented feedback.
The review also cited a trial of 34 older adults, where video-screen feedback during single-leg training improved their balance. See the full review on PubMed Central.
The authors say only a few studies have linked how often feedback is given to skill gains, so the evidence is still thin. Still, it supports the simple idea in this guide. Seeing your clip while hearing the cue gives you two inputs instead of one. That is our reading of the review, not a claim from the authors.
Flexibility and heated yoga
A 2013 controlled trial by Tracy and Hart on a heated, humidified yoga programme reported flexibility gains alongside changes in body composition. We name it without a link, because the abstract page was blocked when we checked. It studied whole classes, not standing head to knee pose alone, so it is a hint about regular practice, not a promise.
How the YogaFX Online Course Fits In
A clip tells you what happened in your standing head to knee pose. It cannot tell you which words would have fixed it. That is where the spoken dialogue comes in. Mr. Ian Terry, E-RYT 500 with more than 12,000 teaching hours, leads the YogaFX Online Course. He trained for five years, from 2014 to 2019, with the founder of the Bikram Hot 26&2 method.
The YogaFX Online Course costs USD 329, or 4 payments of USD 82. It covers the 26 postures, the dialogue and the science at home, on your own schedule. If you would like to see how the course is laid out, start from our hot yoga teacher training online course page.
One thing we cannot describe here is the exact feedback process on your practice clips, because it can change from batch to batch. Message the team on WhatsApp and ask how it works right now. That is a better answer than a guess in a blog post.
When you want the heat and a live teacher, the next step is the six-day Bikram Hot 26&2 Yoga Teacher Training MasterClass in Bali. The next batch checks in on Sunday 24 January 2027 and checks out on Friday 29 January 2027, at Soham Wellness Center in Seminyak. The Early Bird price is US$1,899, against the normal US$1,999.
What YogaFX Graduates Say
Standing head to knee pose rewards patience, and graduates often talk about exactly that. These short quotes come from the YogaFX review store, from people who finished the live training in Bali. First names only, with the source and year.
“I'm quite proud of the fact that I stuck it for the six days didn't give up”
Karen, YouTube review, 2025
“it's not just yoga, it's yoga beyond.”
Erinc, YouTube review, 2019
“I'm just glad, just grateful to have met all of you. Each and every one of you I've learned something from.”
Amanda, YouTube review, 2023
Karen's full video review is below. She describes a hard week and why she stayed with it, which is a useful frame for any pose that humbles you at first.
Karen, YouTube review, 2025: a one-minute message after the six-day training.
Who Should Check With a Professional First
Balancing on one leg loads the knee, hip and ankle of the standing side, and it asks the back to stay long. So a few people should get advice before they start.
Joint injuries. Anyone with a current knee, hip, ankle or back problem should talk to a healthcare professional first.
Dizziness. If standing on one leg makes you dizzy, stop and get it checked before you practise again.
Heat concerns. If you plan to move from home practice into a hot room, read our guide on how safe hot yoga is first.
Pain in a joint is a signal to stop standing head to knee pose. A stretch in the back of the leg is normal, and a sharp pain behind the knee is not. Take the slower route, and tell your teacher about any injury before class.
FAQ
Can I learn standing head to knee pose online?
Yes, you can learn the steps, the order of the cues and the common fixes online. Film yourself from the side and the front, then compare each clip with the cue. A video cannot replace a teacher's eyes in the room, so keep your goals modest and ask for feedback whenever you can.
How do I know my standing knee is locked?
Tighten the thigh until the kneecap lifts, then check a side-view clip. The leg should look straight and firm, with the knee over the ankle, not pushed backward or softly bent. If your hip sags behind the foot, the thigh has let go, so squeeze again before you lift the other leg.
What is the difference between head to knee pose and standing head to knee pose?
Head to knee pose usually means the seated forward fold, where the floor supports you and the work is a hamstring and spine stretch. In standing head to knee pose, one leg carries your whole body, so balance and strength join the stretch. Check which one a video shows before you copy the shape.
How long should I hold standing head to knee pose at home?
Start with a few slow breaths on each side and stop before your form slips. Hold only as long as the standing knee stays firm and the chest stays tall. Add a breath or two over several sessions and rest between sides. If a joint hurts, stop and ask a healthcare professional.
How much does the online course cost?
The YogaFX Online Course costs USD 329, or 4 payments of USD 82. It covers the 26 postures, the spoken dialogue and the science at home, led by Mr. Ian Terry, E-RYT 500. Message the team on WhatsApp to ask how feedback on your own practice clips works before you buy.
Still have questions? Message Mr. Ian and the YogaFX team on WhatsApp and we will answer them personally.
Hybrid yoga teacher training splits the course in two: you learn theory and the teaching script online at your own pace, then practise teaching live with a trainer. At YogaFX the live part is a 6-day intensive in Bali. Done well, each half does a job the other can't do.
Most people who search for this are weighing the same trade-off. A fully online course is flexible but you never teach a real body in front of you. A fully in-person course gives you that, but it asks for weeks off work. A hybrid course tries to keep the best of both. Whether it works depends on how the two halves are joined.
This guide explains how hybrid yoga teacher training works from the student's side, what to practise at home before you travel, and what the research does and does not say.
What hybrid yoga teacher training means in practice
The word hybrid gets used loosely, so here is the plain version. A hybrid yoga teacher training has an online part you finish before you travel and a live part where you teach and get corrected in person. The online part carries the knowledge. The live part carries the skill.
The knowledge side includes anatomy, the structure of a class, teaching ethics and, in a hot yoga course, the dialogue you will say aloud. You can read, watch and rehearse that at home. Nobody needs to be in a room to learn what the spine does in a forward fold.
The skill side is different. You have to speak clearly, watch several students at once, and fix a posture with your voice. That only improves when someone watches you do it and tells you what they saw.
The two halves at YogaFX
Online pre-course. You study at home through the YogaFX online academy before the live block starts.
Live intensive. You join a 6-day practical block in Bali, with check-in on a Sunday and check-out on the Friday.
Certification. The programme leads to Yoga Alliance RYT 200-Hour certification plus the Bikram Hot 26&2 200-Hour International Yoga Certification.
How online theory and a Bali intensive fit together
A hybrid yoga teacher training only works when the live week starts where the online work stops. If the online part is a loose pile of videos, you spend the first live days catching up. If it is built as preparation, you arrive with the words, the order and the anatomy already in your head.
Think of blended yoga teacher training as sequencing. You do the slow, repeatable learning at home, where you can pause and re-read. You save the fast, social, high-feedback learning for the room. That is why the live block can stay short, even in an online plus in person YTT format.
Format
Where theory is learned
Where teaching is practised
Time away from home
Best for
Fully online
At home, on a schedule you set
On video, with written or recorded feedback
None
People who cannot travel and want the theory first
Hybrid
At home, in the online pre-course
Live, in a studio, with a trainer in the room
One short block (6 days at YogaFX)
People who want flexible study and real teaching reps
Fully in person
In the classroom, on the course timetable
Live, in a studio
The whole course
People who can pause work and home life for weeks
How the three common formats split learning and practice. Figures for the hybrid column describe the YogaFX programme.
What the live week is for
The live week is not for lectures. It's for teaching reps. You stand up, say your part of the class, and hear what worked. Then you do it again, because repetition is how the words stick. By the end of the week you have taught many times in front of other trainees and a trainer who knows the material.
A live practical block: the trainer watches, corrects and lets trainees try again.
Mr. Ian Terry is E-RYT 500 with 12,000+ teaching hours, and he leads the Bali block himself. Trainees get feedback from a person who has taught the same dialogue for years, not from a recording. That's why the feedback loop is the main reason to travel.
6 days
Live block in Bali
One short intensive, after the online pre-course is done.
1,500+
Graduates
Trained at YogaFX, from more than 80 countries.
59.3%
Halved symptoms
Heated yoga group in the Nyer 2023 trial, against 6.3% on the waitlist.
g = 0.74
Spacing effect
Benefit of spaced over massed retrieval practice in 29 studies.
Preparation changes how much you take from six days. The most useful home work is small and regular. You don't need a hot room to do most of it, so you can start today.
Say the words aloud. Read your teaching script out loud, standing up, for 10 to 15 minutes. Silent reading fools you into thinking you know it.
Record yourself. Use your phone. Listen back for filler words, rushed endings and a flat voice.
Learn the postures from the inside. Practise the sequence regularly in a class you trust, so your body understands what you will describe.
Study the anatomy in short blocks. Twenty minutes on four days beats one long weekend.
Ask for a friend's eyes. Teach a short section to a friend or family member and ask what was unclear.
If hot classes are new to you, build up slowly, and start your hybrid yoga teacher training online study first. Our guides to heat acclimatization and how safe hot yoga is explain the warning signs and a gradual way in. Hydrate, stop if you feel unwell, and check with a doctor first if you have a heart, blood pressure or other health condition.
Timing matters too, because spaced study only works if you start early. Here is a simple plan for the weeks before your flight. It's a suggestion, not a requirement, so adjust it to your own schedule.
Week before travel
Online study focus
Speaking practice
Body practice
Weeks 4 to 3
Anatomy basics and class structure
Read the script aloud, one section a day
Two or three classes a week, building up gently
Weeks 2 to 1
Teaching ethics and student safety
Record yourself and listen back
Keep the same weekly rhythm
Final week
Revise your weakest topics
Teach a friend one full section
Rest well, hydrate and travel calmly
A sample preparation plan for a blended yoga teacher training with an online pre-course and a live block.
Between blocks, trainees can ask questions and try a section again.
The science, study by study
Research cannot tell you whether one school's hybrid programme is better than another's. It can tell you whether the ideas behind the format are sound. Two bodies of evidence matter here: how people learn a script, and how heated yoga affects the people you will teach.
Spacing your study helps you remember
A 2021 meta-analysis in Educational Psychology Review pooled 29 studies on retrieval practice. Latimier, Peyre and Ramus found a strong benefit when practice was spaced out rather than massed together, with an effect size of g = 0.74. You can read the full paper on Springer.
This was not a yoga study, so treat it as a learning principle, not proof about any course. It does support the logic of a pre-course. Weeks of short, repeated practice at home should hold a dialogue better than one cram session in the live week.
Heated yoga and the students you will teach
A randomised trial from Massachusetts General Hospital tested eight weeks of community-delivered heated hatha yoga in adults with moderate to severe depression. Nyer and colleagues randomised 80 people and analysed 65. Symptoms fell by half or more in 59.3% of the yoga group against 6.3% of the waitlist, published in the Journal of Clinical Psychiatry in 2023. Read the record on Europe PMC.
The authors describe it as preliminary and call for further research with active control groups. Our walk-through of the Harvard hot yoga depression study shows how it was run. For a teacher, the lesson is humility: students may come to class carrying a lot, and your job is to teach safely, not to promise outcomes.
A 2025 systematic review by Willmott and colleagues, covering 43 studies and 942 participants, also looked at Bikram-style practice and reported benefits for flexibility and well-being. This article is general information and not medical advice. Consult a healthcare professional before starting hot yoga.
What students say about hybrid yoga teacher training online and live
Reviews cannot replace research, but they show how the format feels to people who finished it. These come from YogaFX graduates and were left on Google and YouTube.
"He is a great teacher, truly an authentic, genuine person. The course was intense and required discipline, I loved it!"
Stacy, Google review, 2024
"If I wanna do another YTT, I will definitely do it with YogaFX."
Atika, Google review, 2019
Shannon, who finished the 200-hour training in 2024, put it simply in a short video message: she can highly recommend it and felt privileged to train with Mr. Ian.
Shannon, YouTube review, 2024: a 32-second graduation message after the 200-hour training.
Notice what the reviewers mention: the teacher, the discipline and the team. None of them praise the video platform, so the online part clearly isn't what stuck. That fits the idea that the online part is the quiet groundwork, and the live part is what people remember.
Common mistakes in hybrid yoga teacher training
Most problems come from how people use the format, not from the format itself. Here are the ones I'd watch for, whichever school you pick.
Treating the online part as optional
Some students leave the online work until the last week. Then they spend the live days reading instead of teaching. Finish the online pre-course early, so the live block is for practice.
Expecting the live block to fix everything
Six days is a short time. You'll leave with real teaching experience and honest feedback, but you won't leave a finished teacher. Keep teaching after you get home, for example to friends or in a small community class.
Choosing on price alone
A cheap course that never puts you in front of a live audience may leave you unable to teach. Ask any school how many times each trainee will teach in person, who gives the feedback, and what the certificate actually allows. Our guide on how to choose a yoga teacher training lists seven claims worth testing.
Skipping the health conversation
A hot room is demanding. If you have a health condition, speak to a doctor first and tell the trainers before you start. That's part of being a responsible future teacher, because you'll be asking the same of your own students.
Is hybrid yoga teacher training right for you?
Hybrid yoga teacher training suits some people far better than others. Ask yourself these questions honestly.
Can you study alone? The online part of a hybrid yoga teacher training needs self-discipline. If you need a class to keep you on track, say so when you enquire.
Can you take about a week away? Six days in Bali is far easier to arrange than several weeks.
Do you want to teach, not just deepen your practice? The live block is built around teaching reps.
Are you comfortable in a hot room? If not, start with classes and the safety guides above.
If you answered no to most of these, a longer in-person course or a fully online one may suit you better. A good school will tell you that before taking your deposit.
Trainees after the Bali intensive, together after six days of teaching practice.
The YogaFX hybrid programme in Bali
YogaFX has trained 1,500+ graduates from 80+ countries since 2017. The hybrid yoga teacher training programme is the Bikram Hot 26&2 Yoga Teacher Training MasterClass: an online pre-course, then a 6-day practical intensive in Bali led by Mr. Ian Terry.
Next batch: check-in Sunday 24 January 2027, check-out Friday 29 January 2027.
Venue: Soham Wellness Center, Seminyak.
Price: US$1,899 Early Bird, against a normal price of US$1,999.
Certification: Yoga Alliance RYT 200-Hour plus the Bikram Hot 26&2 200-Hour International Yoga Certification.
Ask the team how many spots remain for the next batch. If you would like to start the learning side today, the YogaFX Online Course costs USD 329, or 4 payments of USD 82.
Hybrid yoga teacher training splits one course into two parts. You study theory, anatomy and the teaching script online at your own pace, then practise teaching in person with a trainer. The online part builds knowledge at home, and the live part builds the skill of teaching real people.
How long is the in-person part of a hybrid yoga teacher training in Bali?
At our school the in-person part is a 6-day intensive in Bali, with check-in on a Sunday and check-out on the Friday. The next batch runs from Sunday 24 January 2027 to Friday 29 January 2027. You complete the online pre-course first, so you arrive ready to teach.
Can I join a hybrid yoga teacher training if I have never tried hot yoga?
Yes, but build up first. Take a few classes, learn the warning signs of overheating, and talk to a doctor if you have any health condition. Message the team on WhatsApp and we will help you plan your preparation before you travel to Bali.
Which certificates does the hybrid programme lead to?
The programme leads to Yoga Alliance RYT 200-Hour certification and the Bikram Hot 26&2 200-Hour International Yoga Certification. Teachers who already hold a certificate can ask about the YACEP option. Always check the current requirements on the official Yoga Alliance website before you enrol anywhere.
How much does the hybrid yoga teacher training cost?
The Bali programme has an Early Bird price of US$1,899, against a normal price of US$1,999. The standalone Online Course costs USD 329, or 4 payments of USD 82. Message the team on WhatsApp for the current room options and available spots before you decide.